For what seems like way too many months now I have been
working on our Master Bath Renovation. It was a simple and budget
friendly update that I had hoped to knock out in just a couple of weekends,
but as with most home projects there were a few setbacks.
Before we go any further here is a look at the master bath
stripped down prior to its little face lift!
I don't have a good quality pic to show you a before of the window, but prior to the update there was a privacy film on it. That was the very first thing I removed! I LOVE natural light and see no reason to keep it out.
The black and white tile floor and subway and marble shower details I am a total fan of so that was a huge relief and cost saver. Basically for this reno we would only be updating the pale green walls, hardware, and decor.
Usually, I can paint a room of this size in a couple of hours. However, I
quickly discovered that the previous homeowners who had purchased our home and did
a quick flip within a year (which I am totally grateful for) had pulled wallpaper down and left glue sporadically
behind. Ugh!!! I’ve never seen paint looks so terrible on a wall, total
disaster. I then tried to take on sanding and priming the walls and I
lasted for about um...30 minutes! I had to call in back up aka Daddy to take
over. The smell of the primer was just too much for these little lungs of
mine.
In addition to painting the walls, I also gave the window trim, molding, and ceiling a fresh coat of paint.
The abstract artwork I hung where the towel rack used to be is actually printable/digital downloads from Etsy! I printed the images on cardstock paper and picked up frames from Michael's! I felt super frugal and proud of myself for thinking outside the box.
After the walls were done, I started painting all of the
hardware. The lighting fixture, the cabinet handles, even the toilet
paper holder. They were a brushed silver originally. I try with
every room I update to stay on budget and cut costs where I can. I loved
our hardware just not the color. So out came my trusty bottle of spray
paint. I could not get over what a difference the color change made.
I also changed our current mirror from white to black to add a more dramatic
contrast to the white walls.
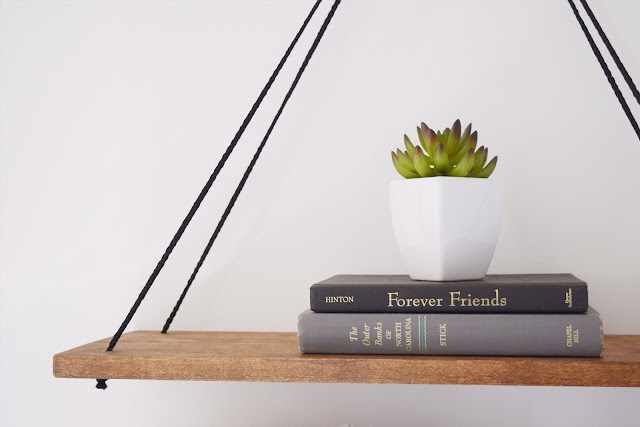
Next I had Scott step in to help and we tackled the
shelving. I’ll be honest, the shelving was a vision I was determined to
bring to life. I knew I not only wanted to see these handmade shelves by
Scott and I in our master bath, but I also wanted to see them in the
Did I mention the store opens THIS WEEK and these darling
shelves can be YOURS?!
Finally, everything was in place and it was time to pull in
the décor, my favorite part.
In the end this small renovation took longer than expected, but I couldn't be happier with the end results. The space feels bright and roomy and that was my overall end goal.
One weekend soon I hope to tackle a Roman shade for the window, but honestly I am loving all the light that pours in every morning and afternoon!
The Details
Paint Color - Benjamin Moore, Decorators White (my all time fave)
Swing Shelf - Delightfully Chic Lifestyle
Printable Artwork - Etsy
Jute Basket - TJ Maxx
Jute Rug - Bed Bath & Beyond
Accent Decor - Hobby Lobby, Michael's, and Local Antique Stores


This comment has been removed by a blog administrator.
ReplyDeleteWhat kind and color spray paint did you use for the hardware?!
ReplyDeleteIs this available somehow? It's darling and I would love to use for a newly remodeled bathroom!
ReplyDeleteThannk you
ReplyDelete
ReplyDeleteYour post on the master bath renovation is both inspiring and detailed, offering a comprehensive look into the transformation process of a key living space. I really appreciated the step-by-step insights you shared, from initial planning to the final touches, which highlight the importance of both functionality and aesthetics in a successful remodel. Your detailed narrative provides valuable tips on selecting materials, optimizing layout, and ensuring a balance between modern trends and timeless design. The way you showcase the dramatic improvements not only elevates the overall ambiance but also creates a serene and luxurious retreat. For anyone looking to achieve similar transformative results in their home, I highly recommend exploring R for Remodelers for expert guidance and innovative remodeling solutions.
reecaai4q21
ReplyDeletegolden goose outlet
golden goose outlet
supreme outlet
golden goose outlet
supreme outlet
golden goose outlet
golden goose outlet
golden goose outlet
golden goose outlet
golden goose outlet
bathroom renovation Vaughan
ReplyDeletebathroom renovation Mississauga